
AN EGG IDEA
In my book I talk in detail about how important it is to mix your dough well. During mixing we aerate the dough and create air bubbles. The CO2 produced by the yeast during fermentation will encounter these air bubbles and dissolve into them and come out as gas. In order for the CO2 to become gaseous, it has to enter an air bubble. The structure of the bubble, the outer layer, was examined and it was discovered that it contains mostly protein. An under developed dough is dull and the texture of the walls of the air bubbles is doughy and can't retain gas well. The well developed dough has a shiny look to it with air bubble walls of protein that can trap and retain gas very well. As the dough develops, it draws protein to the bubble walls and when it expends in the oven, there's enough protein to allow the bubbles to expend without breaking.

Having learned all of that, one sleepless night I was struck with the idea to add an egg to my dough as part of the hydration. An egg is like adding more protein to the dough, hence more strength. I couldn't wait to get up and mix. As you can imagine, I didn't sleep much that night. I was overly stimulated with excitement.
So, this post will be about my experiment with an egg. The first time I added an egg as part of the hydration was last year and since then I've baked many more to prove to myself again and again that an egg makes a difference.
The texture of the crumb is a of certain quality, it's soft and tender and creamy. The color is pale, pastel yellow, it makes me think of some sort of pudding or creme.
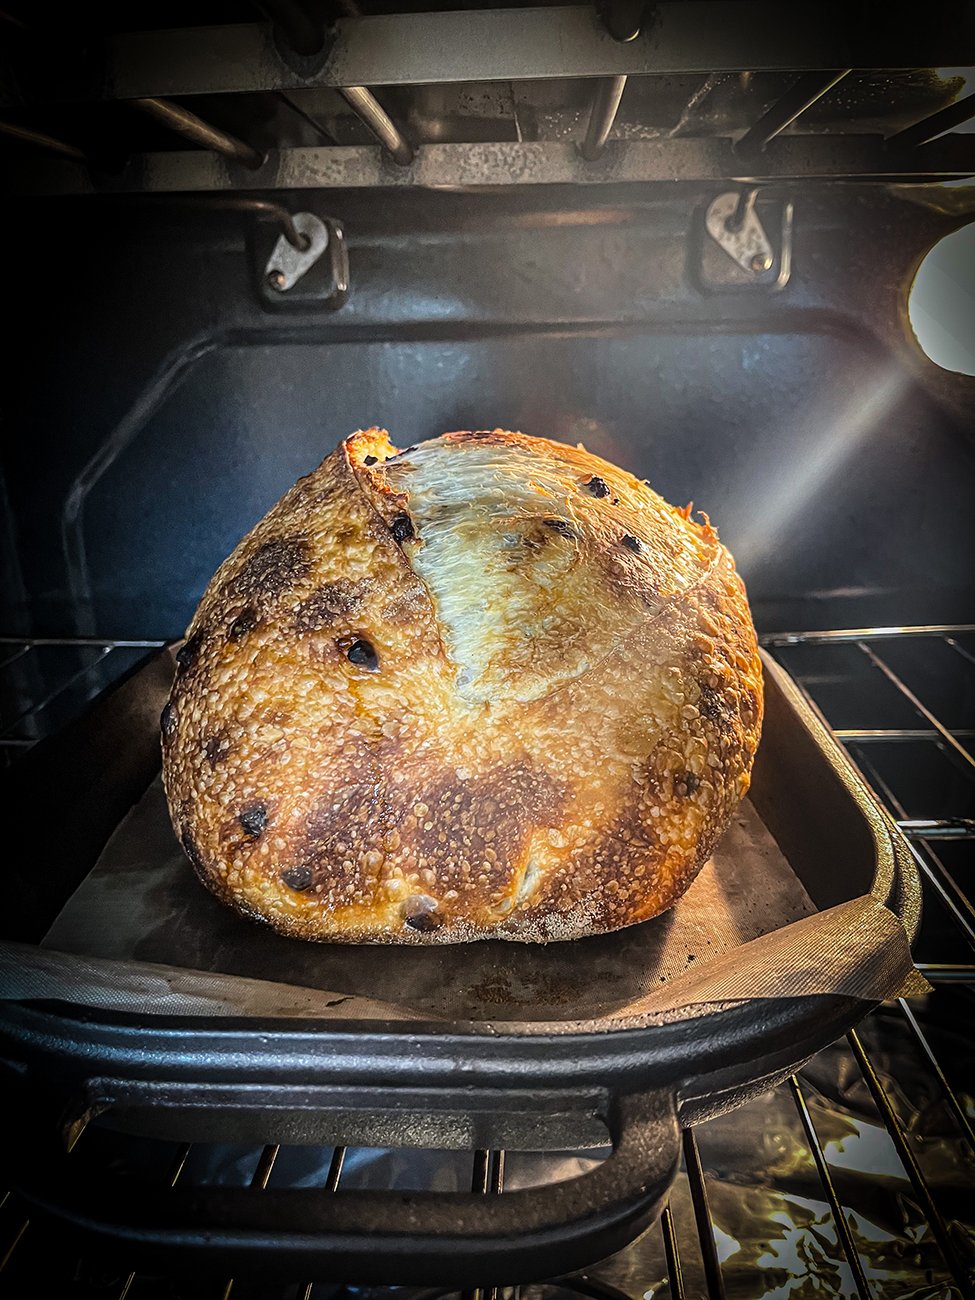
In this recipe, I decided to add chocolate chips and make it sweet. They really make a splash when they melt during baking and the newly born flavor from the marriage of an egg and chocolate is delicate and smooth. The taste of the egg is very subtle and pleasant. Some people taste it more than others.

HOW AN EGG AFFECTS THE DOUGH AND FERMENTATION
Adding an egg to your dough will require higher hydration. More protein needs more water. The egg will add strength and we want to bring in a little more extensibility.
Adding more protein to your dough will definitely extend bulk fermentation. Don't be afraid to ferment your dough well. It's very easy to under ferment it if you watch the clock and not the dough, and compare it to your other doughs and timings. Each dough is individual and requires unique treatment and development.

A dough with added egg as part of the hydration can handle long fermentation very well without degrading the gluten. It will keep strong shape. Of course all of the other variables involved in sourdough making must be done right as well.
During baking, the egg will brown your crust beautifully and your loaf will express itself very well with a big oven spring.
STEP BY STEP METHOD
INGREDIENTS:
350g bread flour(I used Bob's Red Mill artisan bread flour)
297.5g water+egg(my egg was 55.7g and the rest was water 241.8g water)
65-70g active starter
7g salt
chocolate chips(I never measure the inclusions, just eyeball them)
1. Break and lightly beat the egg in a glass and measure it. Then add water until you get to 297.5g. Stir well.
2. Add your flour in a mixing bowl and pour the egg water. Mix well to incorporate. When adding an egg, I always use only white bread flour because I don't want to change the color from the egg. If you use a mix of white and other whole grain flour, the color of the egg will translate differently.
3. Do an autolyse. Here, my autolyse was 1h 45min
4. After the autolyse, add active starter and mix to incorporate well. I added very mature starter which was 16h old, 16h after feeding that is. In my book I talk a lot about mature starter and how you can successfully make open crumb bread with it. Here I added 65g because this is what I had left. Usually I add 70g
5. Let the dough rest for 30min
6. Add the salt and mix well to incorporate
7. Let the dough rest for 30min
8. Do lamination where you add the chocolate chips. Fold the dough and transfer to a bulking dish
9. Let the dough rest and then perform 4 coil folds separated by 45min. After each coil fold, measure the dough temperature. Mine was maintained at 72-75F.
10. After the last coil fold, let the dough finish fermenting well. You want your dough to look big and puffy with rounded edges. My total bulk fermentation, from adding the starter to shaping, was 9.5h with the dough placed in a proofer at 75F.
11. Shape your dough with your chosen method. I never pre shape. Soon I'll be adding shaping videos of my big and puffy doughs
12. After shaping, place the loaf in the fridge for proofing. My proofing was 16h at 40F
13. Bake straight from the fridge. I baked my loaf in The Challenger Bread Pan, 20 min with the lid on at 500F and 20min without the lid at 430F. Just know that with an egg, the loaf will bake faster. Also depends on your oven and your method of baking.
