the magic of long autolyse

Making bread with new flour is like wearing your new pair of Manolos to work. You need to ease your feet into them and stretch them out a little bit, learn them and see how they feel. You might be in a these-shoes-pinch-my-feet-but-I-love-them situation.
I found myself replacing one addiction with another very quickly. Now in my closet, I have different flours where my shoes used to be. I love experimenting and learning how flours absorb water, how they affect the crumb and the crust of the bread. This is the case for this loaf, I just got new flour and could barely wait to wake up and make bread with it. That’s how I used to feel when I bought a new pair of shoes, I couldn't wait to walk in them.
The flour is hard red winter berry and its color is so warm and creamy. Winter wheat is planted during fall, September, October. It grows a little bit before winter comes and then it stops growing, covered and protected by snow during winter. When spring comes, it resumes growing and it’s harvested during the month of May and it continues through July.
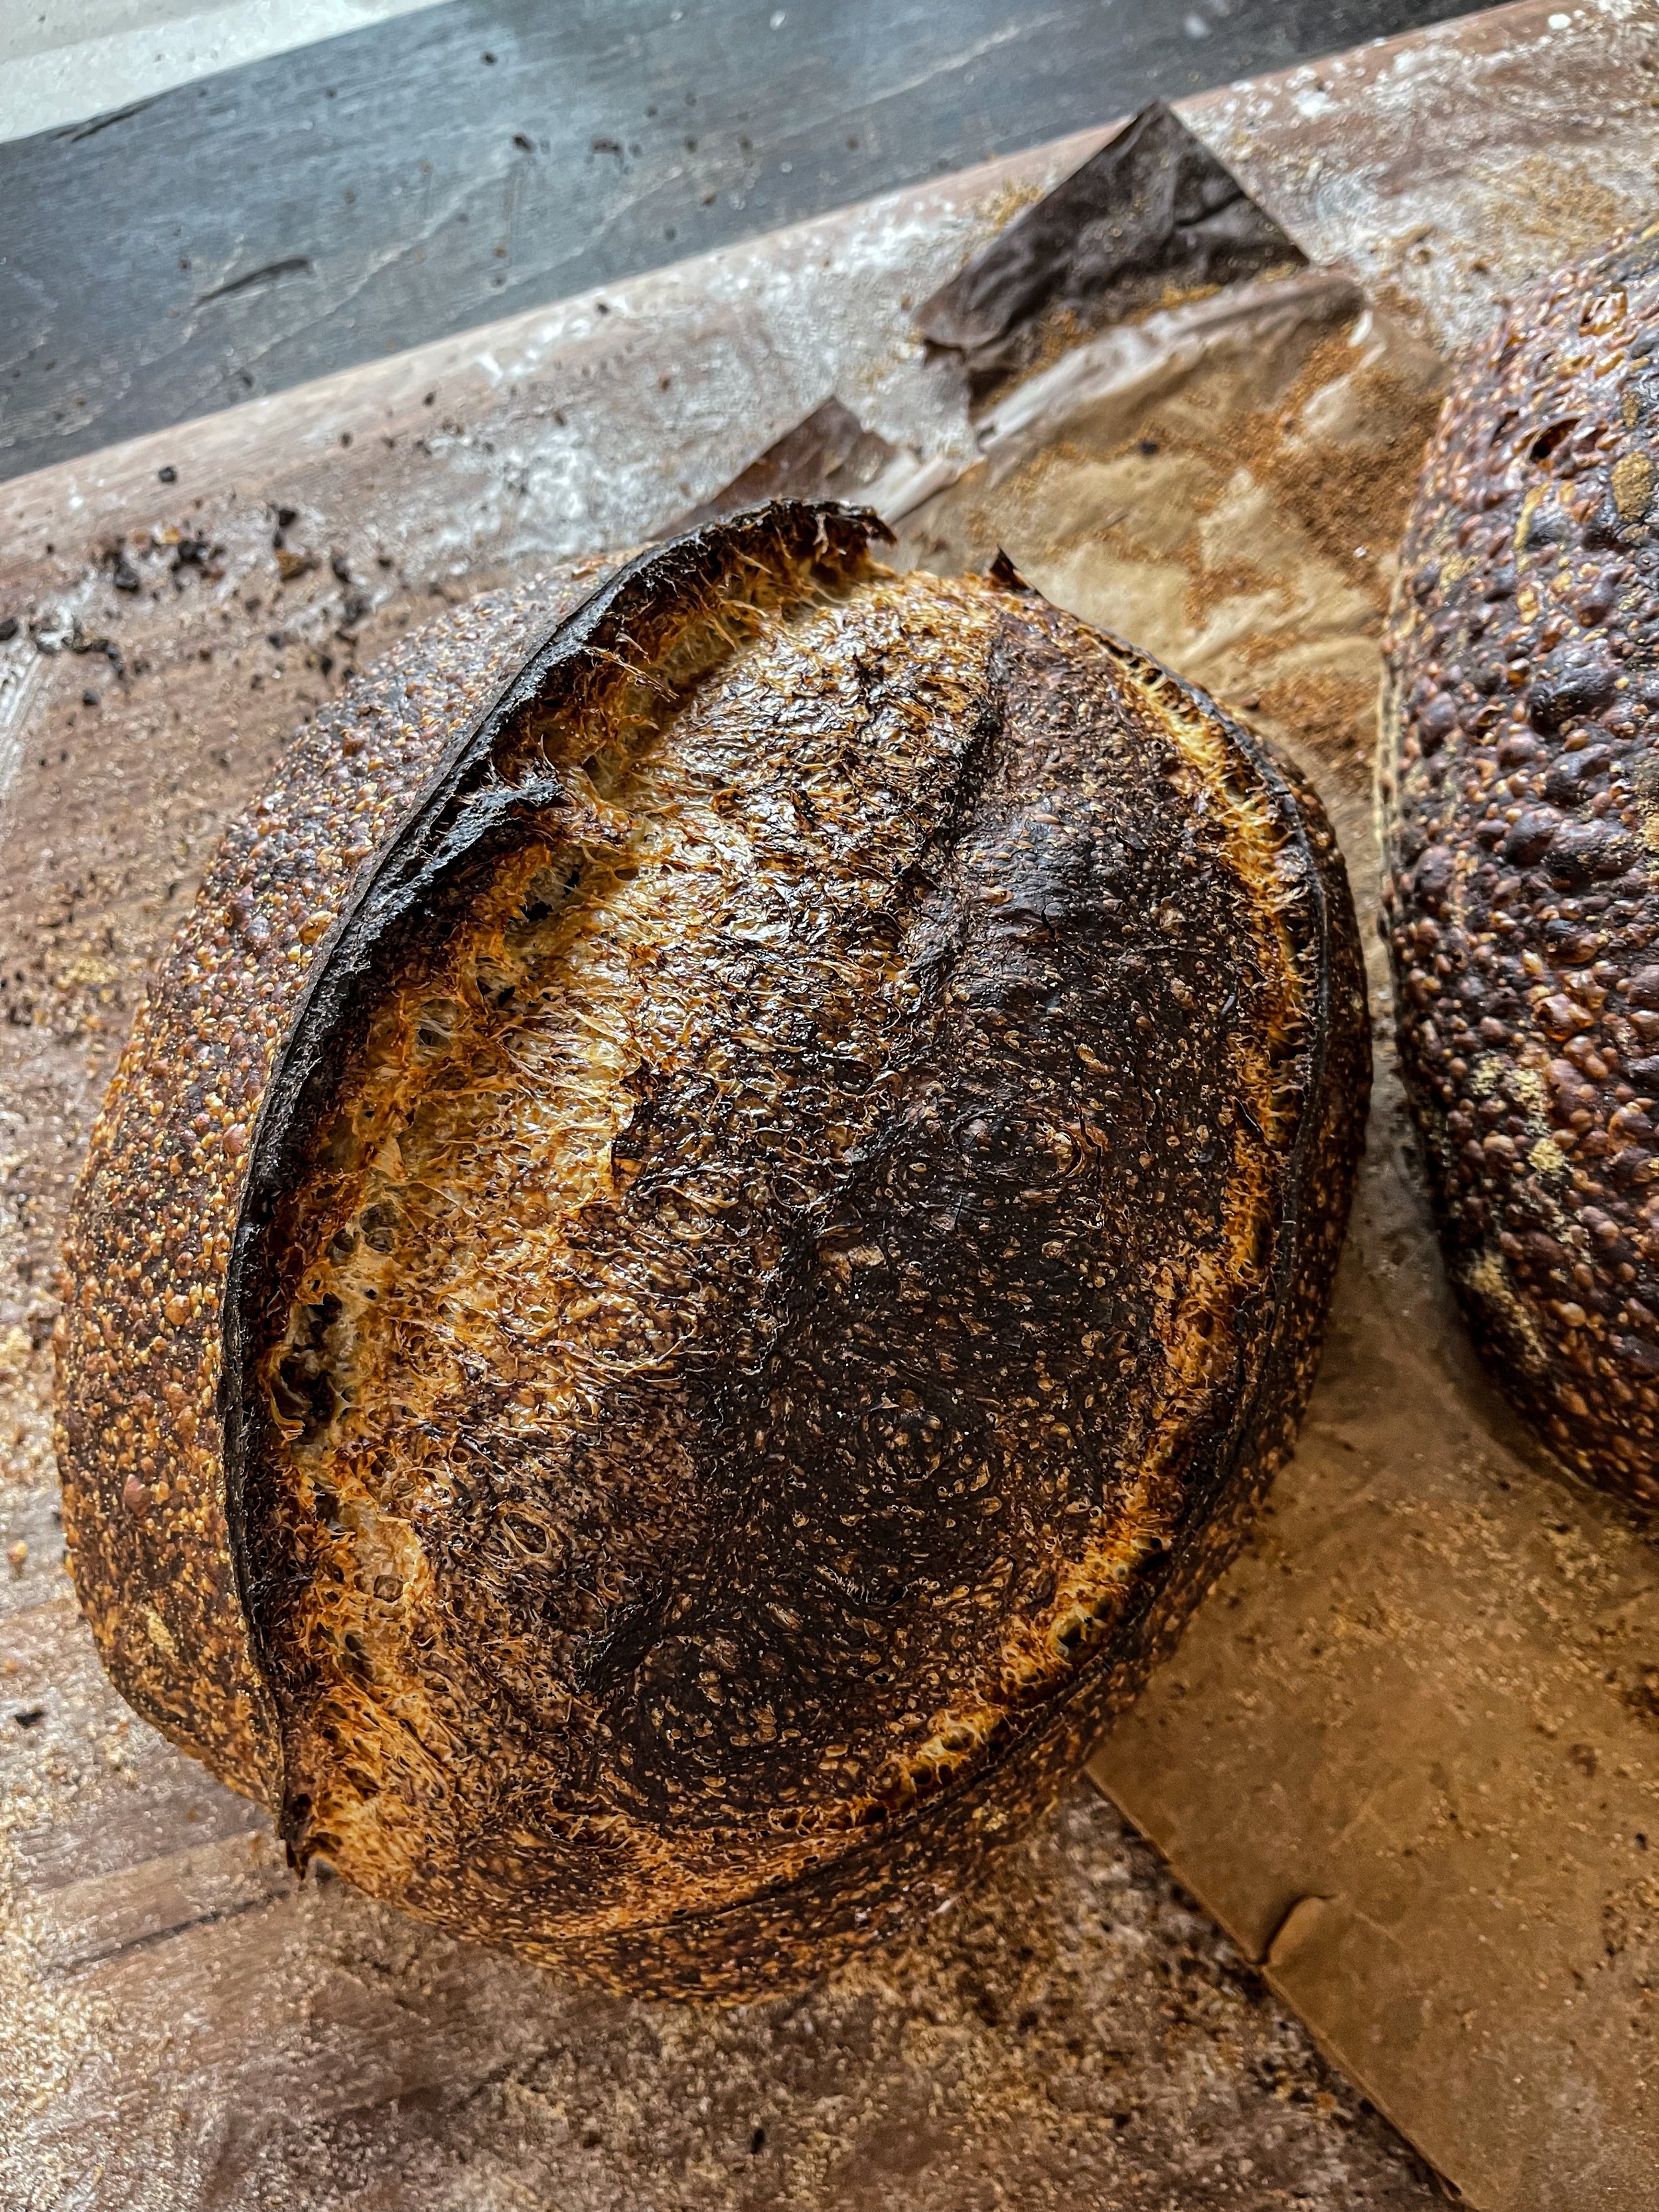
The protein content of the winter wheat is a little lower(11-12%) than that of the spring wheats. And yet, I must say that this loaf did very well with long bulk fermentation of 9.5h It did feel very extensible, kind of weak even, after long fermentation, and on top of that the overnight autolyse also added more extensibility. So, I guess I was risking over fermenting it but was pleasantly surprised when I saw the oven spring. You might know from my Instagram posts that I love doing long bulk fermentation and yes, I treat the information about the flours I use with respect, but still, I’d trust my eyes first. If my eyes don’t see that beautiful and big, and puffy dough that I crave all the time, I won’t shape it. Even with the risk of over fermenting. That’s the sweetest risk to take, push bulk fermentation and the potential of the dough, see the result and make the necessary adjustments next time.
They say winter wheat is more nutritious than spring wheat because is spends much longer time in the ground.
I’m looking forward to baking more with it and explore its possibilities.
Now, let’s talk autolyse.
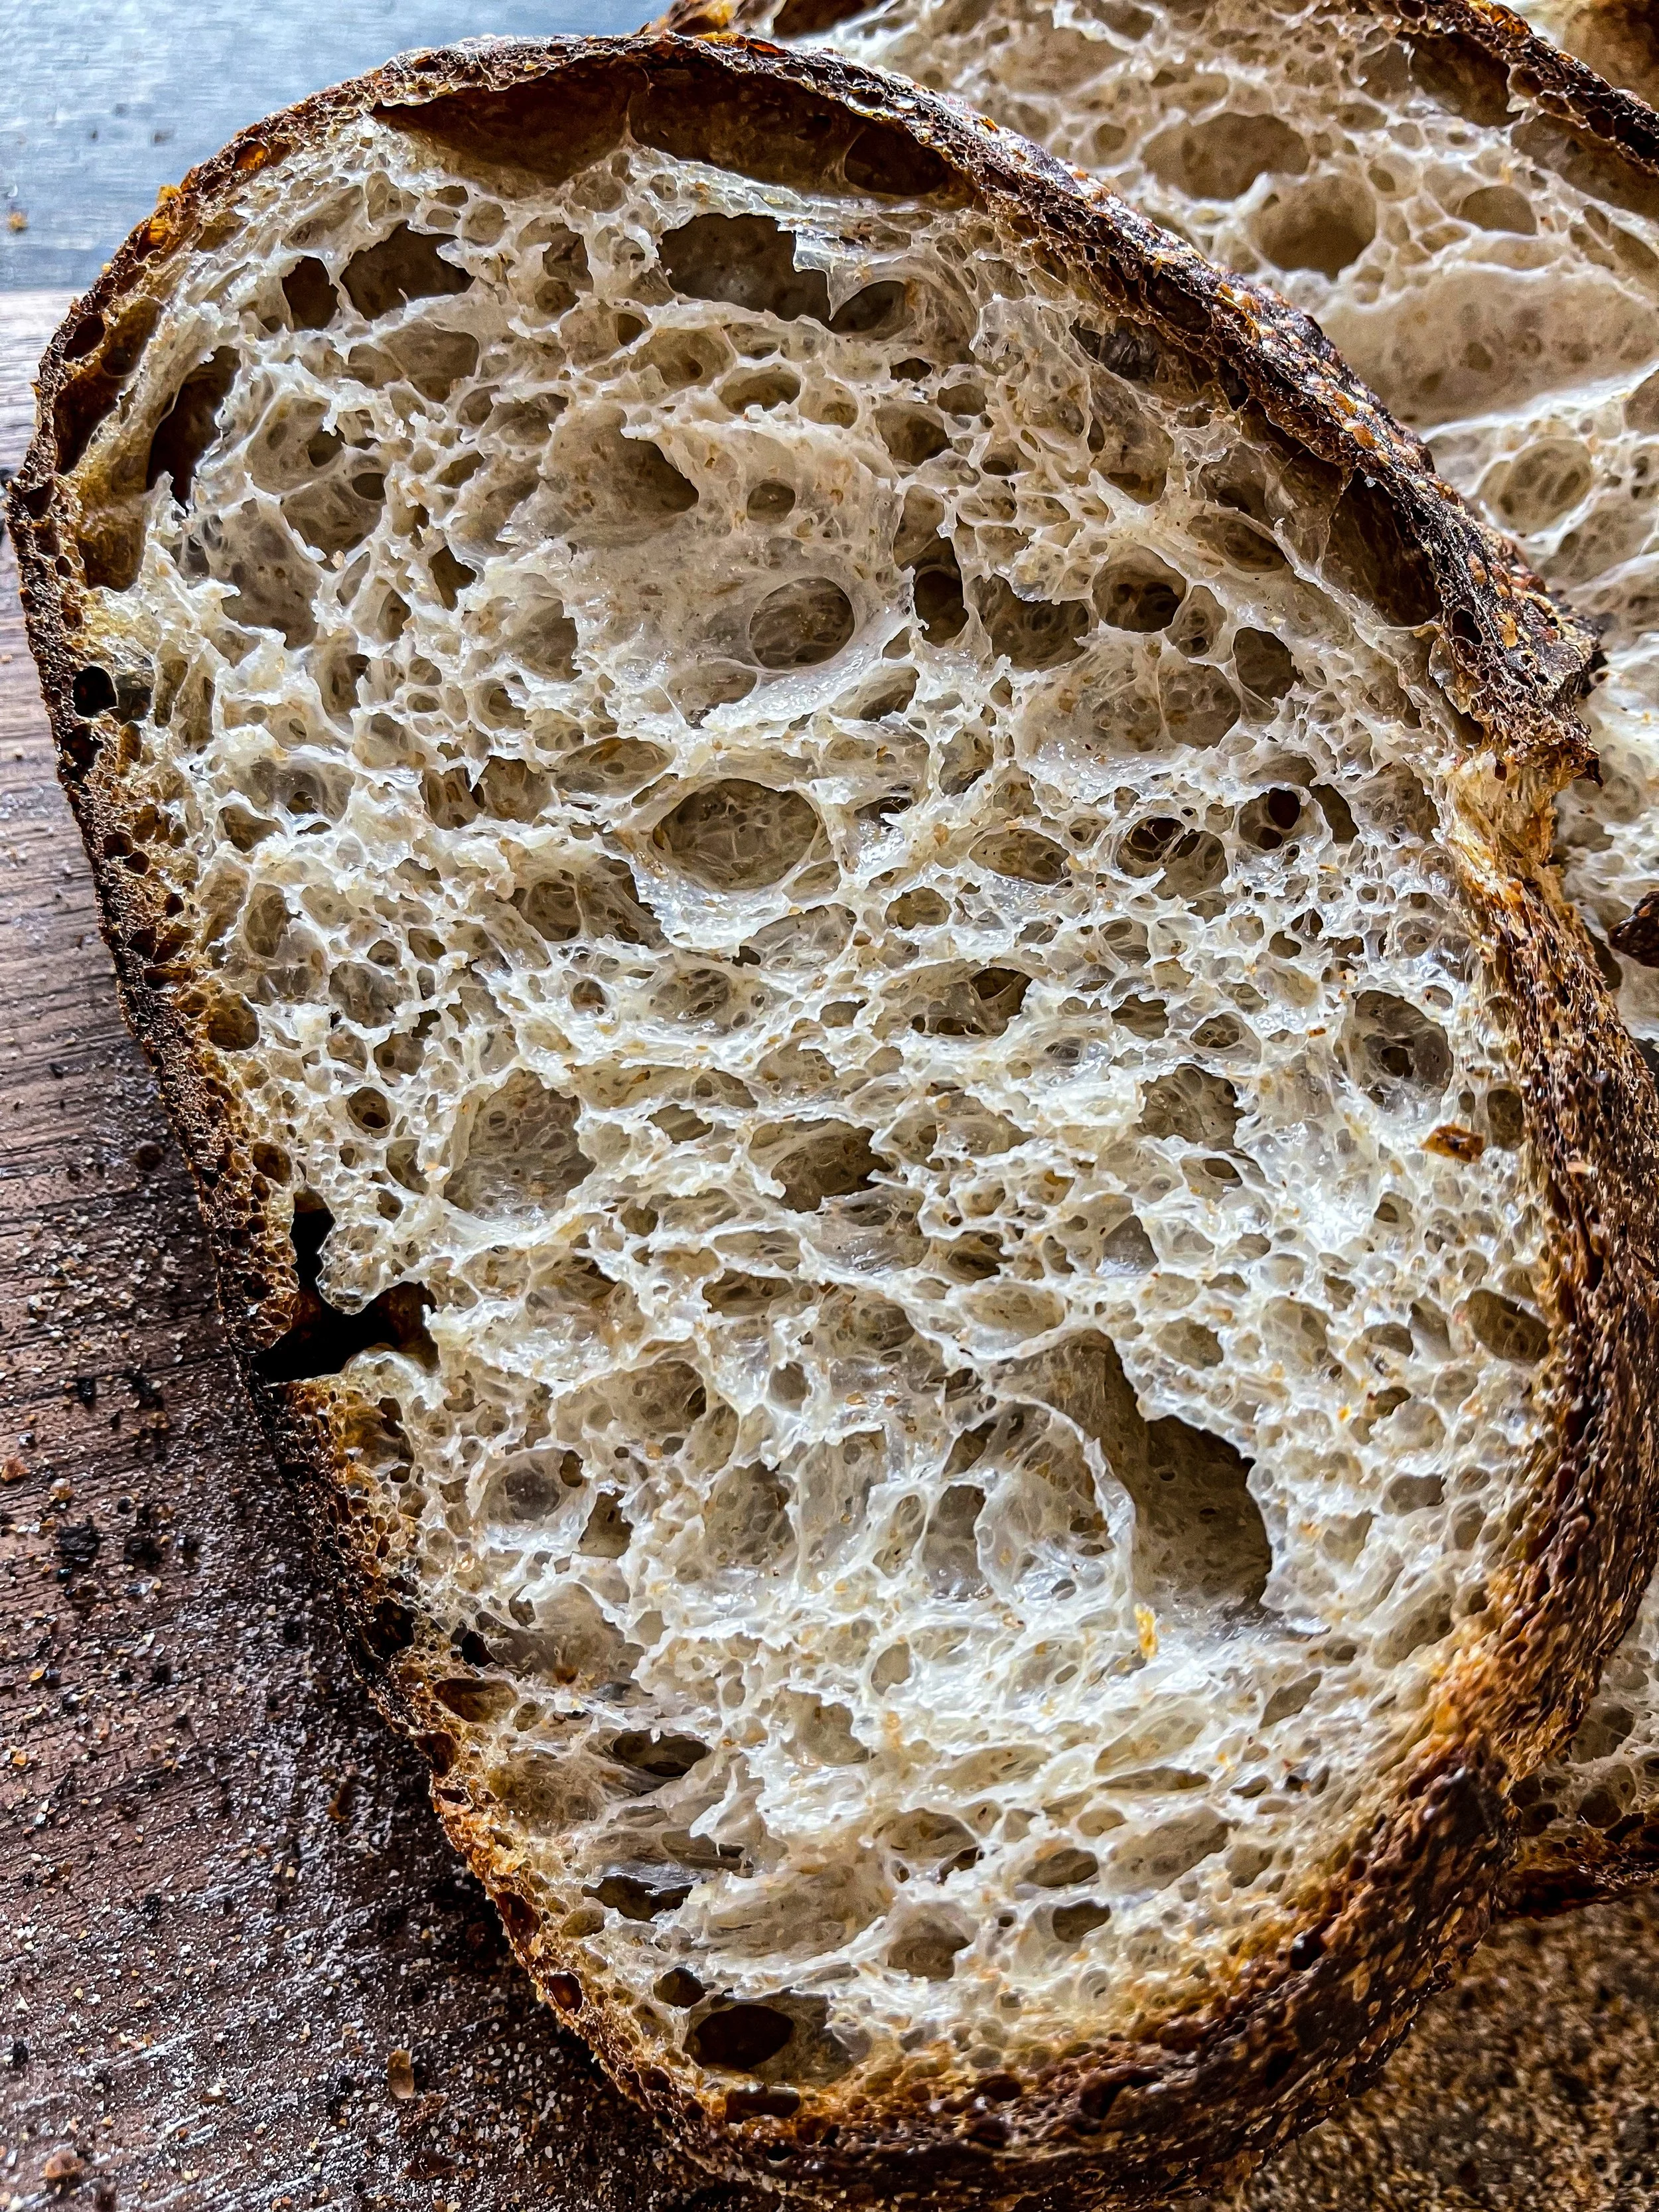
Autolyse is the quiet part of mixing. It does a lot without much or any work done. Simply by mixing only flour with water, the dough self smooth itself just by sitting in a bowl. It gives a good start for gluten development and at the same time the enzyme protease in the flour degrades it, weakens it, which is a good thing. To a degree, protease activity is very good for the dough because it makes the bread soft. Without it, the bread would be too tough. The dough becomes extensible during autolyse because of the weakened gluten. That also contributes to a good oven spring because the dough doesn’t have to push through all that strength. During the autolyse, the enzymes start converting the starches into simple sugars which will be consumed by the yeast. The sugars will also bring extra crispness to the crust and will caramelize it.
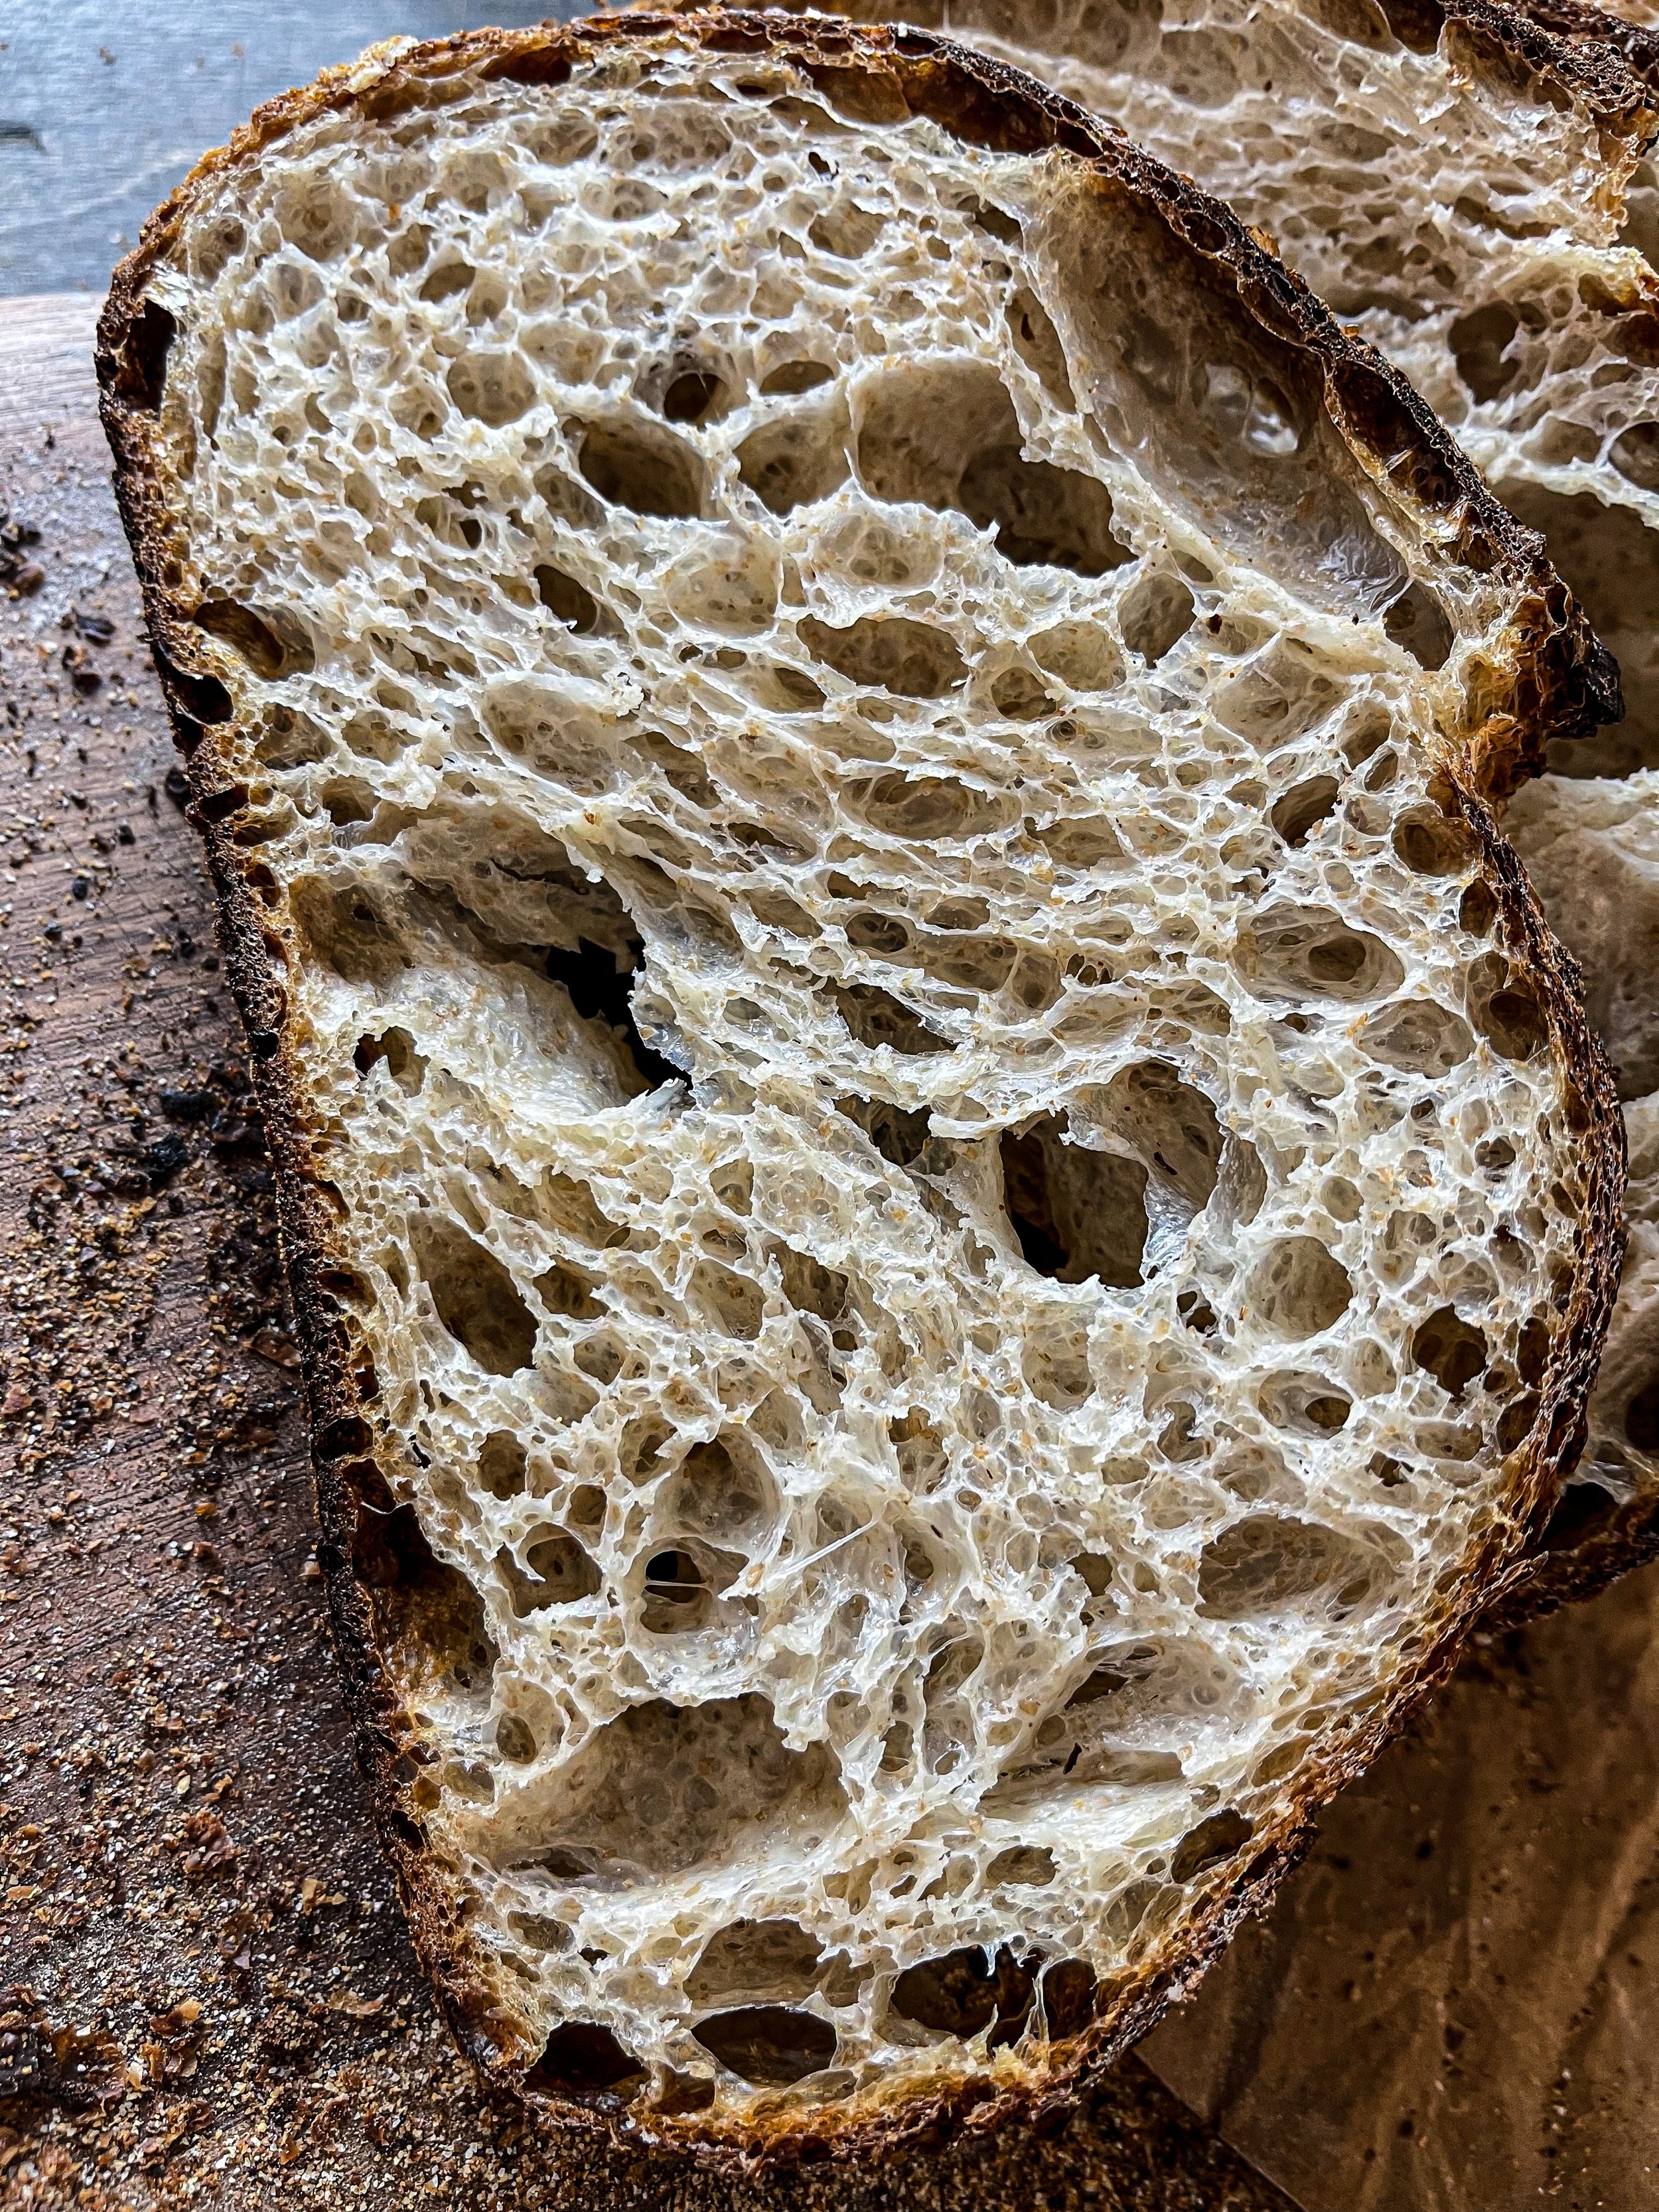
The longer the autolyse, the more extensible the dough becomes. That extensibility balances very nicely with the strength that the starter brings to the dough with its acidity. Of course it has to be the right acidy. If the starter is not balanced well and if one kind of bacteria is more present than the other, then that could weaken the dough more and make it even more extensible to a point that it won’t be able to build a strong dough structure. But that’s another topic.
With overnight autolyse of 13h, you wake up to find the dough with fully developed gluten. It’s perfectly smoothed and relaxed, beautifully extensible, it feels like heavy velvet curtains in your hands.
Overnight autolyse is very convenient method for sourdough baking but few very important things must be considered.
You have to make sure that the dough will autolyse at cool temperatures(67-72F) so that the proteolytic activity is slowed down. Very often people place the dough in the fridge. I’ve never done that because in my kitchen is very cool, specially at night and that’s where I keep my dough for overnight autolyse.
Also you could keep it in a wine cooler. I personally prefer to use the fridge only for final proofing. I’ve done overnight autolyse always on my kitchen counter at the temperatures mentioned above and never had an issue with too much protease activity.
Many people also add salt to the mix of flour and water for a long overnight autolyse to further slow down enzymatic activity. I wouldn't recommend long autolyse if you live in a hot and humid climate. Unless you provide a cool spot for the dough.
Another thing to keep in mind is that you have to lower the hydration. The reason is the same, to slow down enzymatic activity. Also you have to use strong bread flour, 12-13% is perfect, you don’t need any stronger than that.
STEP BY STEP METHOD
INGREDIENTS:
262.5g bread flour
87.5g whole wheat hard red winter berry
273g water(78% hydration)
70g starter
7g salt
1. Before bed, mix the flour and water and do overnight autolyse. Mine was 13h long at 67F. It could also be 8-9-10h
2. The next day, wake up and discover fully developed gluten. The dough should be very smooth, relaxed and extensible. Add active and strong starter. Mix gently to incorporate. I mixed for 1-2min.
3. Cover the bowl and let the dough rest for 30min
4. Follow up with adding the salt. Mix gently to incorporate. I mixed for 1-2min. The dough should be very smooth and well developed
5. Cover the bowl and let it rest for 30mi
6. Do one lamination
7. Transfer the dough to a bulking dish and let it rest for 30-45min before you perform the first coil fold. My first fold was after 45min. If you see that the dough looks way too slack and relaxed, do the first fold after 30min if you wish.
8. Follow up with the rest of the coil folds separated by 30-45min. I did a total of 4 folds separated by 45min. Watch the dough and see how it’s developing strength and structure. If the dough looks too weak even after the forth fold, add additional one. Measure the dough temperature after each fold. I maintained 72-76F dough temperature. For the first part of bulk fermentation, I kept the dough at 72F and then after lamination, the dough was placed in a proofer with set temperature at 75F.
9. After the last coil fold, let the dough finish fermenting. Watch the dough and see how’s developing, it should be rising and filling up with gas. My total bulk fermentation, from the moment I added the starter to shaping, was 9.5h at 72-75F. They say whole wheat flours ferment faster because of stronger enzymatic activity. There are other things to consider as well, for example temperature and even altitude. I’m at sea level, it always takes much longer. If you are up high in the mountains, it will take faster for the dough to ferment. Also the bran in the whole wheat flours interfere with gluten development which means it would rise more slowly, even though during the long hours of autolyse, the bran had a chance to smooth out and hydrate well. As you see, there are many things to consider and keep in mind. But the most important thing is to watch the dough. I don't turn it over to shape until I see what I’m looking for, a big, round and puffy dough.
10. After bulk fermentation, shape the dough. After I shaped mine, I let it proof for 45min in the bannetone at room temperature 72F. So, then, you could say that my warm bulk fermentation was even longer than 9.5h. The dough felt good and strong in my hands while shaping it so I decided to push its abilities further and see what’s gonna do. When I first turned it over for shaping, it did feel kind of weak but with each fold during shaping, creating good tension, the dough felt strong.
11. Place the dough in the fridge for cold proof. My proof time was 14h 45min at 38F.
12. Score and bake straight from the fridge.