
sweet paprika sourdough

It’s been awhile since I’ve baked sweet paprika sourdough. It always brings me back to my childhood, and my grandmother’s home made sweet paprika. My grandparents grew the sweet red peppers in their garden and when they were nice and ripe, some of them were roasted and put in jars for the winter, or my grandma would make stuffed peppers and all kinds of other meals. With the rest, she made paprika. She dried the peppers under the sun lined up on a fine net and covered them with another piece of net so they wouldn’t be invaded by flies. When they were dry and ready, she removed the seeds and the stems, and ground them by hand to a fine powder. Sweet paprika is added to many Bulgarian dishes and meats. But the one that stands out to me is from my childhood when grandma would slice a thick piece of bread, poured some sunflower oil on top and sprinkled sweet paprika. That was a classic afternoon snack that I grew up with.
Very often I’d open a jar of sweet paprika just so I can smell it and transform myself back to those sweet paprika moments of my childhood.
How paprika affects the dough
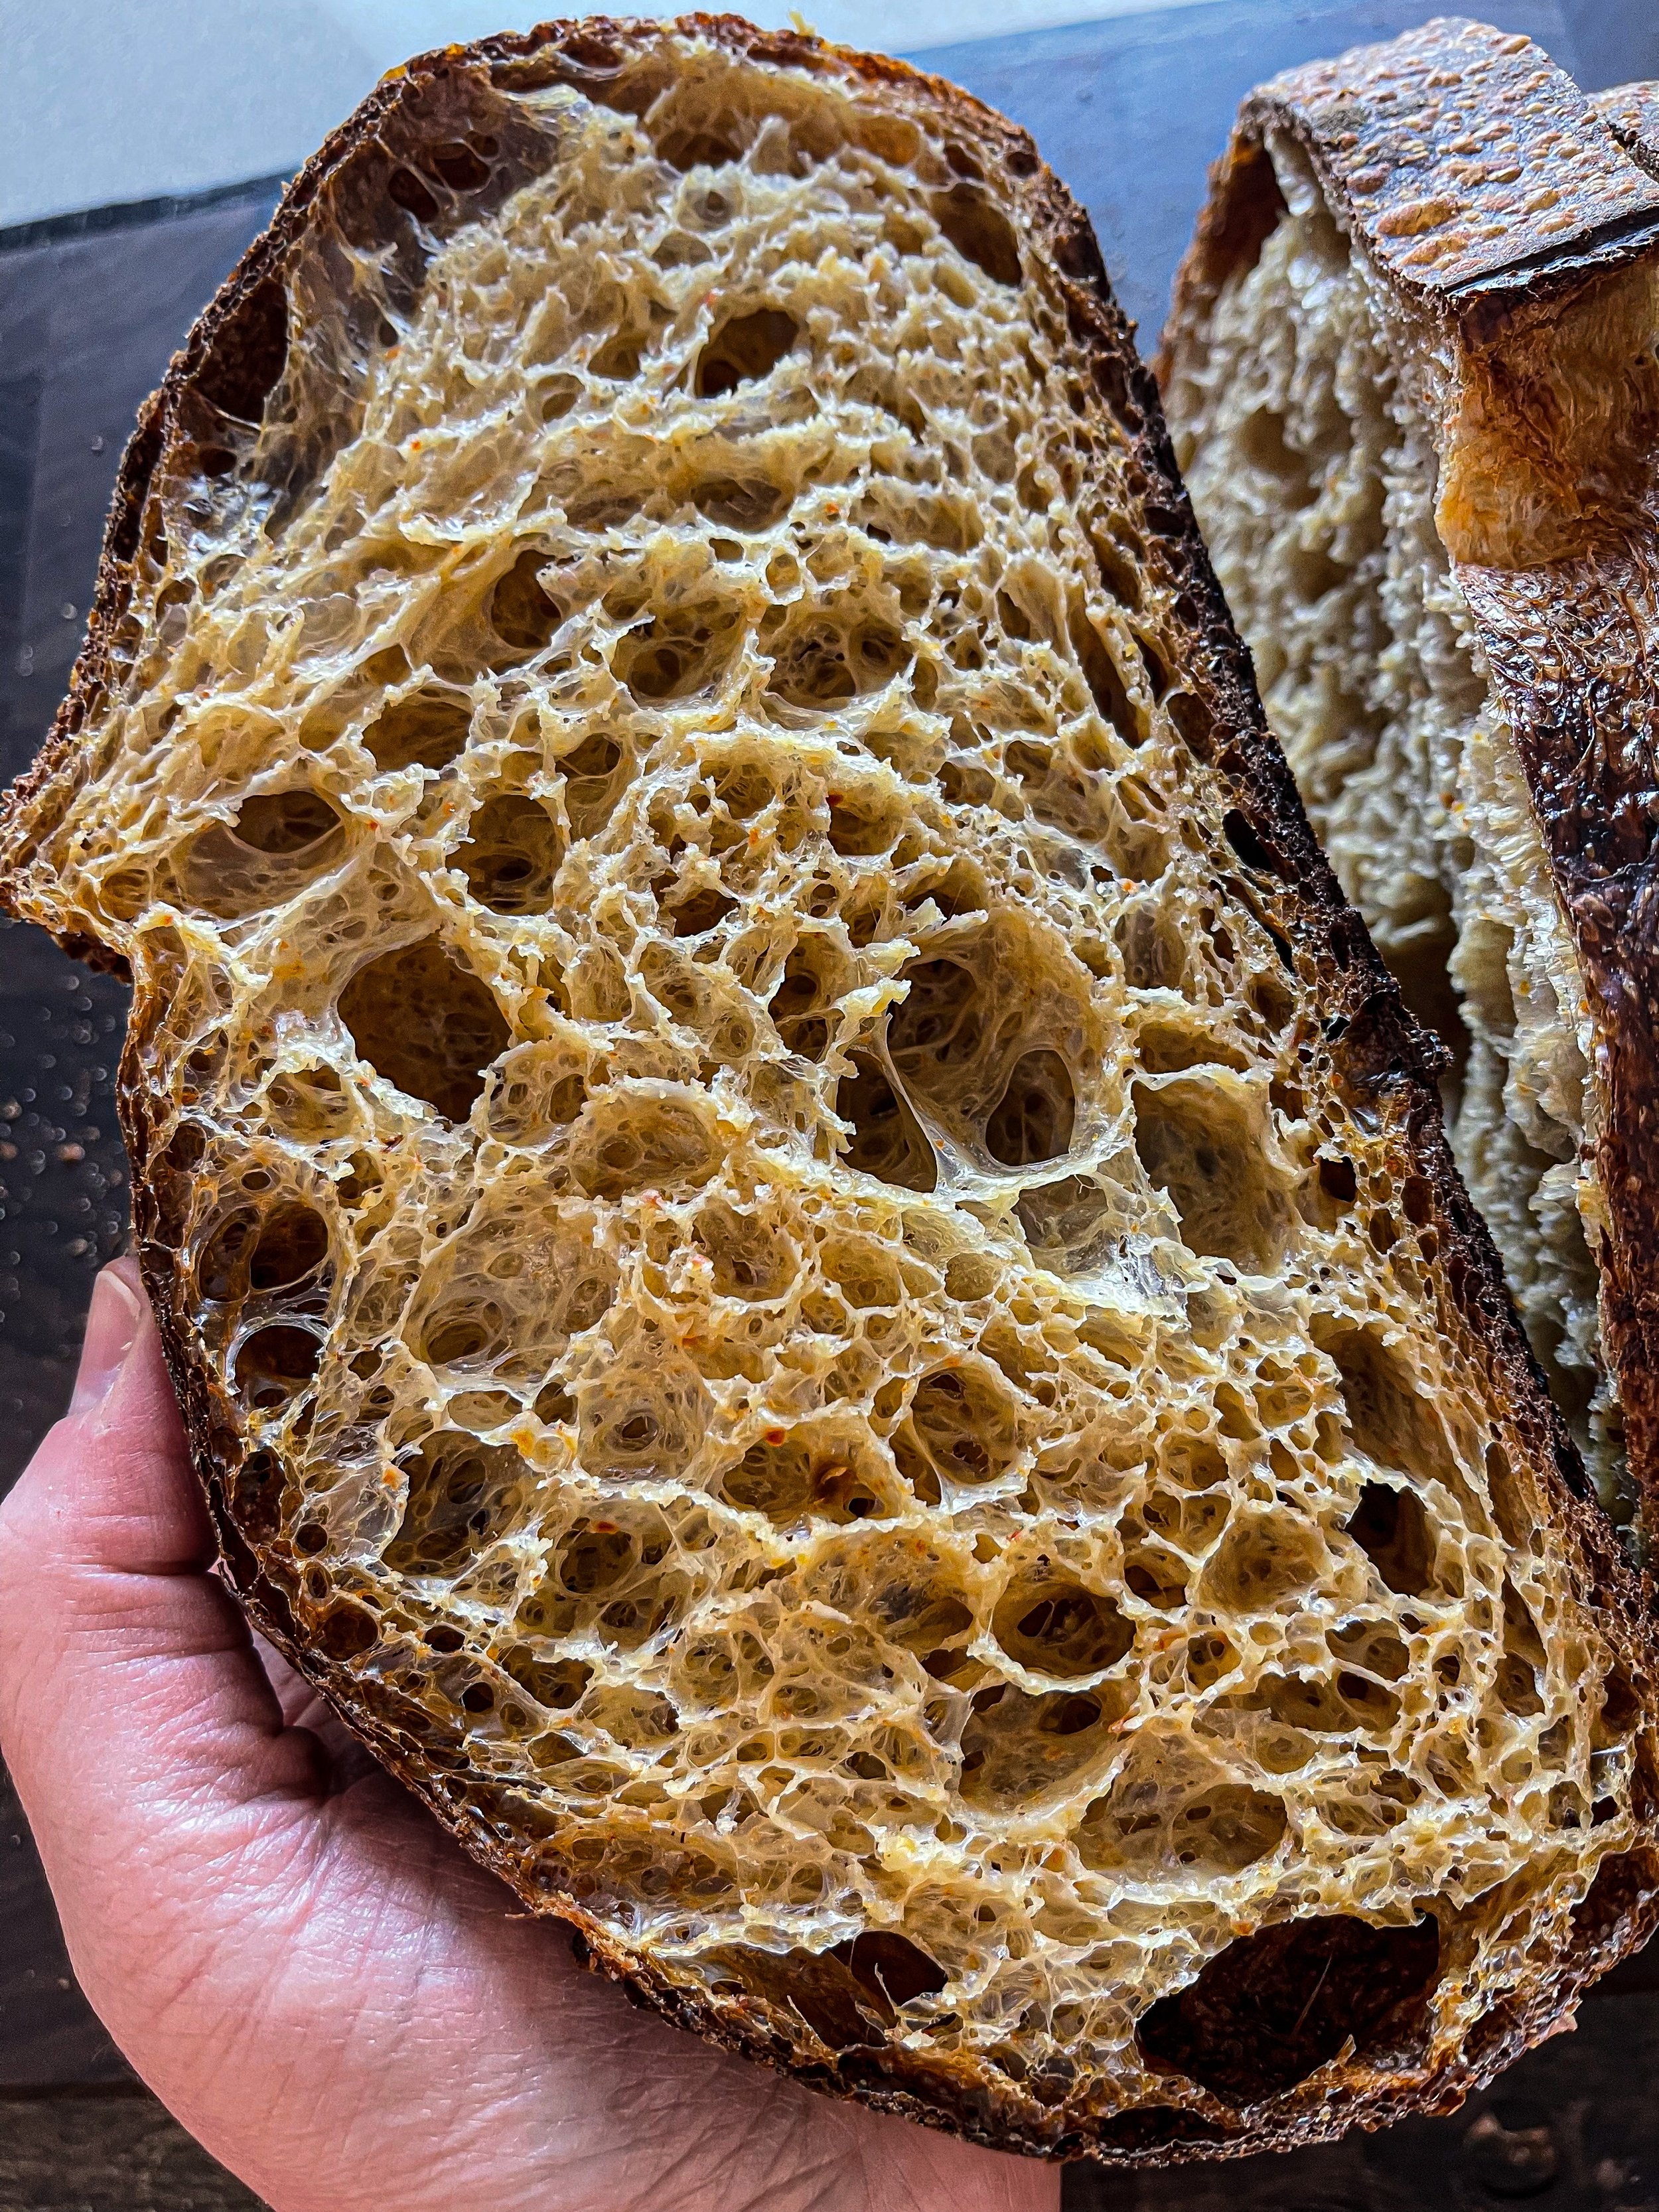
Just like cocoa, paprika tends to affect the dough as it makes it tighter. I’ve baked this bread many times before but just as my cocoa sourdough, I was’t completely satisfied with the results. I wanted to achieve very light and airy crumb with almost broken down gluten which I still needed to be strong enough to lift my loaf. As with my cocoa sourdough, for this dough I added only 1% salt as oppose to the standard 2%. I also raised the hydration and the combination of the two delivered very nice extensibility. Which was still well balanced with the elasticity that the paprika brings to the table.
People often wonder if a bread made with less salt is tasteless. Not to me, it’s not. Earlier last year when I got the idea of adding less salt to my dough, while measuring only 3.5g salt, it still looked like a pretty good amount to me. I baked few loaves to test it and was very impressed with the results. The crumb was of another crumb world. And the bread still had nice flavor, it wasn’t tasteless with less salt.

The few things to consider with adding less salt are that the dough will be a little more sticky and softer. And since there’s less salt, that will affect the rate of fermentation, it will speed it up. Also as I said the dough will be more relaxed and extensible and it will need stronger structure, maybe an additional fold will be required. You need to keep a closer look at the dough and give it what it needs.

rate of fermentation
What I noticed was that even though both, cocoa and paprika tighten the dough, and the crumb of both benefits from less salt, the paprika sourdough fermented faster than the cocoa, the sourdough with cocoa powder, even though with less salt, still was with slower rate fermentation. That only confirms again and again that every dough is unique and it has special needs.
STEP BY STEP METHOD
INGREDIENTS:
350g flour
15g paprika
297.5g water(85% hydration)
70g starter
3.5g salt(1%)
1. Mix flour, paprika and water and do 30 min or longer autolyse. Mine was only 30 min but if I had more time, I would do at least 2-3h. The longer autolyse will also relax the dough and make it more extensible.
2. After the autolyse, add the active starter. As you know, I like to use mature starter and for this loaf my starter was 15h old(15h after feeding that is), kept at 72-74F, ratio 1:6:6(10:60:60)
3. Mix with your chosen method to develop some gluten. My dough was mixed by hand with the Rubaud method. I mixed for 2-3 min, then let the dough rest for 5-7 min and mixed again for another 1-2 min. Make sure you incorporate the starter well.
4. Cover the dough and let it rest for 30 min
5. Add the salt and mix well to incorporate
6. Cover the dough and let it rest for 30 min
7. Do one lamination, fold the dough and place it in a bulking dish
8. Cover the dough and let it rest for 45 min
9. Perform 3 or more coil folds separated by 45 min. My dough was ok with 3 coil folds every 45 min. Observe yours and make sure you build good dough structure. Measure the dough temperature after each coil fold. I maintained 75F dough temperature.
10. Let the dough untouched after the last coil fold and let it finish bulk ferment. My bulk fermentation, counting from adding the starter, was 8.5h at 73-74F.
11. Shape the dough. Make sure you create good tension while shaping.
12. Place the dough in the fridge overnight. My proof time was 13h at 38-40F.
13. Bake straight from the fridge. I baked in a cast iron vessel the first 20 min with the lid on at 500F and another 20 min without the lid at 430F.
